Happy Day!!
I know today I should be showing a Pinterest item...but I don't have one. So, you get this. ;)
Just a quick photo of my newest wreath I made for summer. I used a plain grapevine wreath and decided to spray paint it metallic gold. I added a few pinwheels, a "flower" and a cute little string with fuzz balls (what are they called, anyway??) going across. Simple, but it brought the kind of color I wanted to my door for summer.
I like to party here!
Thanks so much for reading along. Have a great week!
Wednesday, May 30, 2012
Monday, May 28, 2012
Baby Doll Bed
Riley was given a baby doll bed from her Great Nana, my husband's grandmother. It was old, dinged up, and didn't have any bedding for it. So I got busy. Here is what I started with.
I gathered my scraps for a quilt first.
Measured my main materials based on the mattress that came with the bed.
I then cut out different sized pieces and started pining them onto the material.
After pining all of the scraps onto the front, I laid out more scraps on the sides for the binding of the quilt.
I sewed the scraps, then sewed the binding around the quilt.
I also re-covered the mattress, made a pillow, and gave the bed a fresh coat of pretty white paint.
I think it's adorable! And I know Miss Riley likes it also.
I like to party here!
Thanks so much for reading! Have a fantastic day.
Friday, May 25, 2012
Feature Friday {Featuring you}
Happy Friday!
First, so sorry I didn't get to Pinterest Make Me {Wed.}. Here is my excuse....
Yep, I do one BIG yard sale a year...and this one is HUGE! I have never had this much stuff in my single family sale. And I have been gathering and pricing like a mad women. The best thing about this huge sale?? The living room project is *almost* complete. And you can be looking forward to a kitchen re-do as well in the next few weeks......possibly even a bathroom re-do. So, if any of you can spy something you want, you are more than welcome to fly to Tennessee and come to my sell. HA!
Ok, back to Feature Friday!
Free Time Frolics made this covered cork board. I have been looking for something to get myself more organized, and I will definitely be doing this.
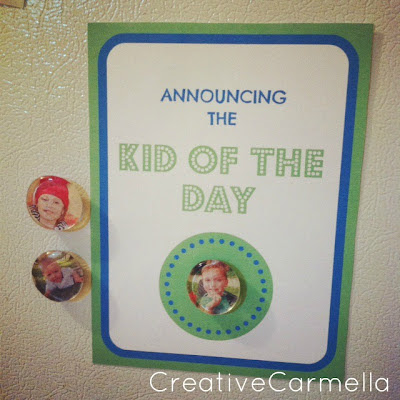
Creative Carmella had a great idea to help with kids. Hop on over and check it out!
Lil Luna made some DIY Lava Lamps. I can't wait to do this with my kids.
That's all for today. If you have been featured please feel free to grab a button!
Monday, May 21, 2012
Dress {Fashion Star}
Morning!
I have officially completed my first pattern! I wanted some new dresses for summer, so off I went to Hobby Lobby. A few weeks ago was 99cent pattern week. And I don't know if I can ever buy a pattern without 99cent week now. How amazing is that?? Next I went to Hancock Fabrics, and found some fabulous fabric for 40% off! All together this dress cost me less than $18. I think that is an awesome price for this type of dress. This is the pattern I got....
I absolutely love it, and have already worn it a few times. Isn't that the best?? Since my daughter will not wear what I make her, I have turned to myself for my sewing.
I like to party over here!
Have a great day, and thanks so much for reading my blog.
I have officially completed my first pattern! I wanted some new dresses for summer, so off I went to Hobby Lobby. A few weeks ago was 99cent pattern week. And I don't know if I can ever buy a pattern without 99cent week now. How amazing is that?? Next I went to Hancock Fabrics, and found some fabulous fabric for 40% off! All together this dress cost me less than $18. I think that is an awesome price for this type of dress. This is the pattern I got....
Here is mine! Please don't pay attention to how awkward I am in front of the camera. I hate "posing". HA!
The pattern was pretty easy, after a few calls to my mom. I had never even looked at a pattern, much less read one and cut it out. I'm blessed to have a VERY patient mom that will allow me to call her 4 times in less than an hour. I also learned how to do button holes! I thought that would be the end of this dress....but I finally decided to get out my machine instructions and read them. HA! So I conquered the button hole AND a pattern! I am too excited!
I absolutely love it, and have already worn it a few times. Isn't that the best?? Since my daughter will not wear what I make her, I have turned to myself for my sewing.
I like to party over here!
Have a great day, and thanks so much for reading my blog.
Friday, May 18, 2012
Friday Faves {Featuring YOU}
Hello! I hope you all are having a great day today! Today the husband and I get to have a date night and go to our Military Formal. I am so excited to go and get some time with him. But for now, I get to show off some of my favorite things I ran across while blog hopping this week.
...love Maegan made some fabulous colorful shoes. I am not kidding you when I say that I have already made TWO trips to the Goodwill this week hoping to find some shoes to do this too!
Bear Rabbit Bear made this adorable Minnie Mouse Camera Lens thing.
Me and My Boys made some Bath Tub Paint for her little ones.
Keeping it Simple sowed us how to make a phone holder to wear while running. I hate having to leave my phone in the car when I go to the gym, so I love this!
I hope you found something that you liked this week! If you were featured you are more than welcome to grab a button!
I hope you all have a fabulous day, I'm off to try and figure out how to do my hair for tonight! HA!
Thursday, May 17, 2012
Barbie's House {Closet/Office}
Welcome to another day of Barbie's House! Are you liking it? I hope you are getting some ideas on things you can do to your own little one's house. If not, I'm sorry. Not really. Just kidding. Anyway....
Barbie has a room that is not really anything specific. I decided to use it as an office/closet. It is the room that is in the middle on the right side in the picture below.
It was only painted white, and I can't have a plain room, so I decided to put up "wall paper" with some of my scrapbook paper stash. I also added a "frame" and a silhouette of my daughter in the middle of it to give it a little personal touch. Here it is now.
I love this room now. Just the wall alone makes it look so much different from the rest of the rooms, don't ya think? Is it sad that I have all of MY old Barbies in her house for these pictures? I promise she has other Barbies. See....
Can you tell I only put clothes on the ones that I would be using in the pictures? Oops...sorry for the nudity!
I like to party over here!
Thanks so much for reading! Have a great day.
Wednesday, May 16, 2012
Pinterest Make Me {Colored Jars}
Happy Wednesday! On Wednesday's I like to take a pin from my pinboards on Pinterest and make them. This way all of my time spent on Pinterest isn't a complete waste!
Last week I wanted to think up a cute gift for my boys teachers. I wanted something that could set on their desk, and make them happy. While going through my pin boards I remembered I seen this pin...
I loved it, but wanted to change it just a little. Here is what I did.
I took two jars and regular craft paint.
Pour your paint into your jar.
Move your jar around until it is completely coated. I just poured paint in little by little until it was covered. I let them dry overnight, and threw in some flowers.
Here they are! I love how they turned out. So bright and cheery. I hope they bring many smiles to the boy's teacher's faces for many years to come. Do you like to make what you pin on Pinterest, or just pin away?
I like to party here.
Tuesday, May 15, 2012
Barbie's House {Living Room}
Welcome to another day of Barbie's House! Today I am going to show you what I did to Barbie's living room. In case you don't remember what her living room looked like, here it is. It is the bottom right room.
I needed something for the wall, so I decided to make a Starburst Mirror. Here is what I used.
I broke the toothpicks in half.
I then hot glued them to the back.
Barbie's house didn't even have real living room furniture. So I decided to make a couch. I stopped by Hobby Lobby and got started. Here is what I used.
I took the two long pieces of wood, and glued them together. This will make the back, and seat.
I used the smaller pieces of wood, and used them for the sides. I moved them half way down so that I would have arms, and the bottom would stand off of the floor a little bit.
I painted it red.....not really sure why since it goes with NOTHING in her room. HA! Here is what Barbie's living room looks like now.
I will probably re-paint the couch soon, but I'm glad to have it look more "put together". Can anyone tell me who the guy is on the couch? I will give you a closer picture of him....
The first person that answers that correctly, may just receive an email from me (as long as your email address is attached to your profile) and receive a little gift from me! ;)
I like to party over here!
Have a great day!
Monday, May 14, 2012
Barbies House {Bedroom}
Welcome to Barbie's House! I used to love Barbies, and now my little girl does too! Last year we built her a barbie house, you can see that post here. Besides just the normal house furnishings, we didn't have it decorated at all. This project has been a long time coming.
Here is what her house looked like.
If you look at the top right you will see the bare, boring room. We can't have that!
I started with Barbie's room. Here was her bed.
I couldn't leave it so plain, and the sides of the blanket didn't even lay down. So of course I made a quilt. Here is what I used. I used the foam as a new mattress, and the blue fabric as the mattress cover. Everything else is for the pillows, and quilt.
Here it is finished. Of course Barbie needs some throw pillows.
Here is what the room looks like now. All of the decor on the walls are from my scrapbook stash. My mom crocheted Barbie a rug, too. And everyone keeps their barbies from the 80's, right? Or is that just me?
I like it much better now, I hope Barbie does too! ;)
I like to party over here!
Have a fantabulous day!
Subscribe to:
Posts (Atom)