


Here is what you will need:
Outside fabric 9 x 14 inches
Front flap 9 x 7 1/2 inches
Inside pockets 9 x 14 inches
Interfacing (half the size of the outside and flap fabric)
Button
Hair tie

Take your outside piece (9x14), and your front flap piece(9x7 1/2) and fold in half. You will fold it width wise (top to bottom) not length (side to side). Iron on your interfacing to one half of both pieces. Shown below. I only did half, because I didn't want it too thick in the end. At this point you can cut your outside piece in half, separating the two sides.

Take your flap piece, and sew your button on to the side with your interfacing. I do this so it will be more sturdy. I sew mine half way in the middle of the interfacing.


Here are the sizes of mine. The top piece is 3 inches, then I put a fold in it and took the "pocket" up to 1 1/2 inches. I followed the 1 1/2 inches up with the next two pockets. This will give your three long pockets, all at the same size. I sewed the tops of each pocket (where my fingers are) to make it more secure. I did the same with the bottom of each slot. Just make sure not to sew it onto the rest of the fabric. Sew the seperate slots only, do not attach them at this point. You will also sew the top of this piece (3 inch part), to make it a finished edge. Once all of that sewing is done. Find the middle and sew a straight line down the middle of all of the pockets. This will now give you 6 pockets, three on each side.

Now you are ready to put it together. Take the interfaced side of your outside fabric and lay it down facing you. Then fold your front flap fabric in half (where fabric is on both sides of the interfacing) and lay button side down onto your outside fabric.

Next you will lay your pocket fabric down, with pockets face down, on top of the back of your flap piece. The pocket piece will stick above your flap piece slightly. That's fine. See how I sewed down each flap for the pockets? I sewed at the folds, and only on the folds. This way the folds are not attached to the other pieces so you will still have pockets, but they will be more secure and move around on you less. I did that for the front tops, as well as the bottom and inside pieces of the folds.

Lastly, lay the other side of your outside fabric piece right side down. This will create a sandwich. Sew around this sandwich from one side to the other, going down the bottom and attaching all the inside pieces. But leave the top open.

Flip your fabric right side out now. You will be able to tell it's a wallet at this point. All that's left is to attach your elastic hair tie, and sew the top closed. I cut my elastic tie, and slid it in between my two top pieces of fabric that have not been sewn shut yet. Iron your fabric down, to make a "pocket" for your elastic tie. Make sure it is centered, and sew down the top, enclosing the cut end of the tie, and leaving the loop out. When I got to the tie, I back stitched over it a few times. Just to make sure it was secure.

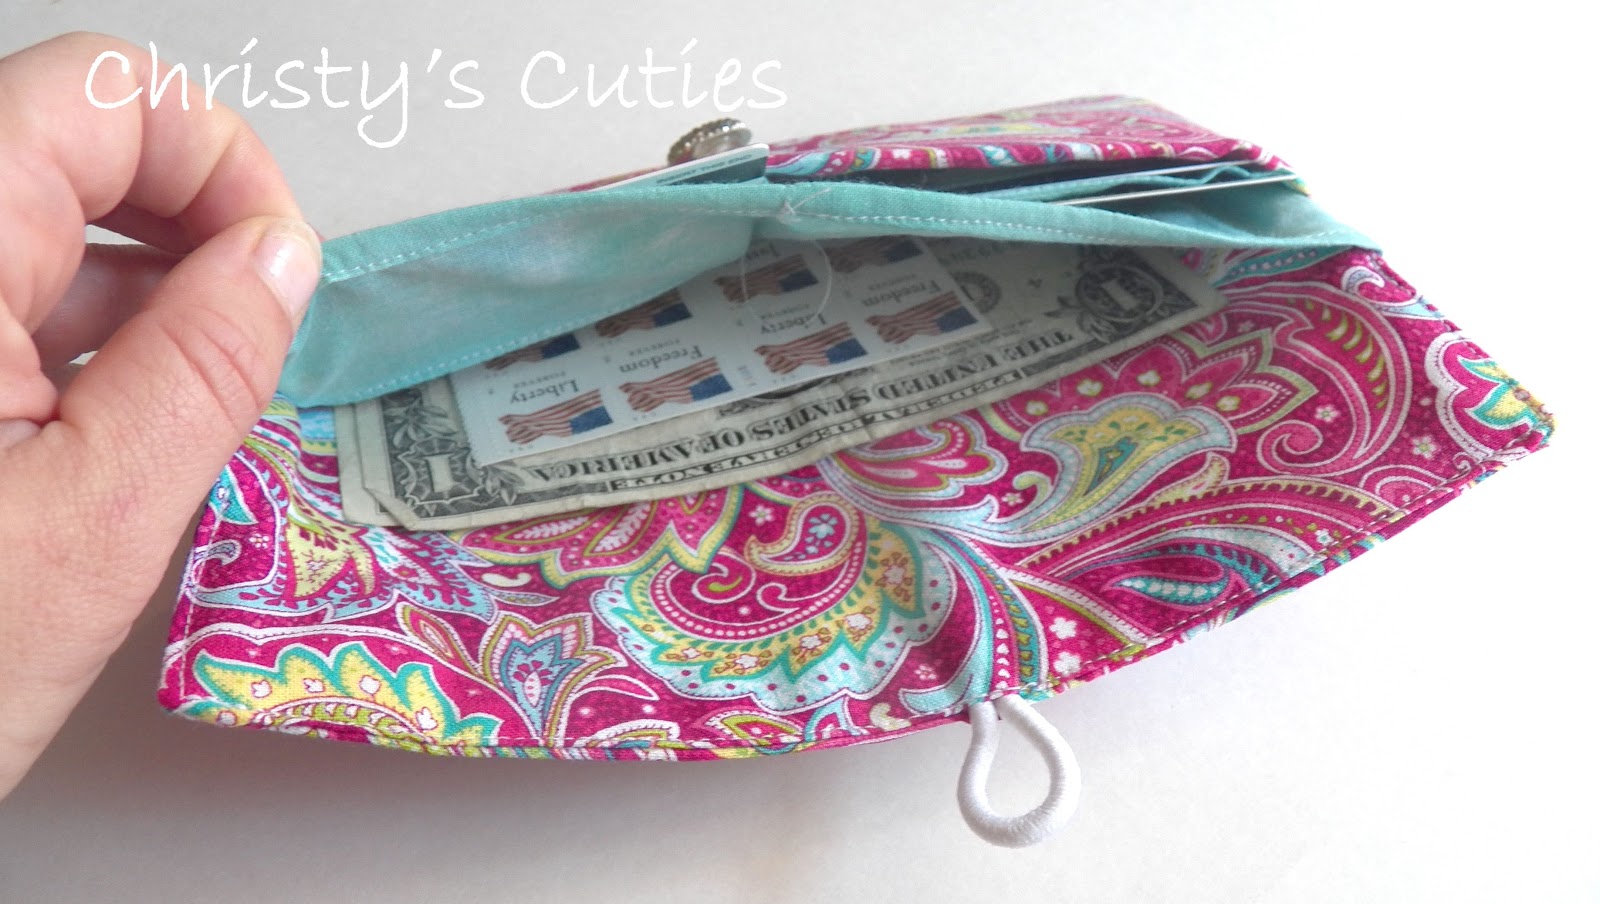
Insert your stuff and your done!

From start to finish this took me about an hour at the most, once I figured out how to do it, again. HA. You will have 6 pockets for cards. 3 on each side.

And a separate pocket for your cash, or whatever else.
And that's it!

I am new to sewing tutorials, and I know I left a few pictures out. So sorry. If you have any questions please let me know and I will do my best to answer them. If you make some, please send me a link, or leave one in the comments. I would love to see yours!
Have a great night!
I like to party at these awesome places.

Oh cute, I'm pinning this, I want to try a wallet :)
ReplyDeleteLOVE! And yes, pinning this too. :)
ReplyDeleteI'm starting a new linky party. I'd love if you came and linked up.
http://www.gingerlymade.com/2012/11/show-and-tell-1.html
So cute I wish I could sew!! Love it
ReplyDeleteSuper cute wallet@ I love the fabric! [www.ladybug-blessings.com come link up for Handmade Tuesdays]
ReplyDeletePinned it..cute, simple, fast! Have a super day and thanks for sharing.
ReplyDeleteVery nice; from one Christy to another!:D
ReplyDeleteI would love for you to share this (or any of your other great ideas) at the link party going on now at ‘Or so she says …’ We’ve also got a fun “Favorite Things” giveaway going on through tomorrow. Hope to see you there! www.oneshetwoshe.com
ReplyDeleteSo cute wallet! Like the fabric too. Thank you for sharing the tutorial!
ReplyDeleteSo gorgeous!!! Love the colour and fabric! Thanks so much for sharing the great tutorial! I'd love for you to visit my blog.
ReplyDeleteHappy week!
Hugs from Portugal,
Ana Love Craft
www.lovecraft2012.blogspot.com
Lovely! I like how you did the card holder slots! Perfect gift idea! Thanks for linking up to Pin Me! I've pinned it!
ReplyDeleteReally pretty fabrics and a great design - I'm inspired to have a go at making one!
ReplyDeleteGreat tutorial on a really cute wallet! How fun it would be to make one for different seasons!
ReplyDeleteHi Christy, I’m Anne from Life on the Funny Farm (http://annesfunnyfarm.blogspot.com), and I’m visiting from Soul Food Mondays.
ReplyDeleteThis is so cute! I'm always looking for nice homemade gift ideas this time of year, and this fits the bill(if you'll excuse the pun) perfectly.
Anyway, thanks for posting this. If you’ve never visited yet, I hope you can pop by my blog sometime to say hi…
This is SO cute! And I LOVE the fabric you went with :) Pinning for later!
ReplyDeleteI would love it if you would link up at Martha Mondays, open now through Wednesday night!
http://www.watchoutmartha.net/2012/12/martha-mondays-link-up-party-features.html
~Amanda
www.watchoutmartha.net